With spirits boosted after seeing excellent compression numbers, I resumed removing, cleaning, & refurbishing engine components.
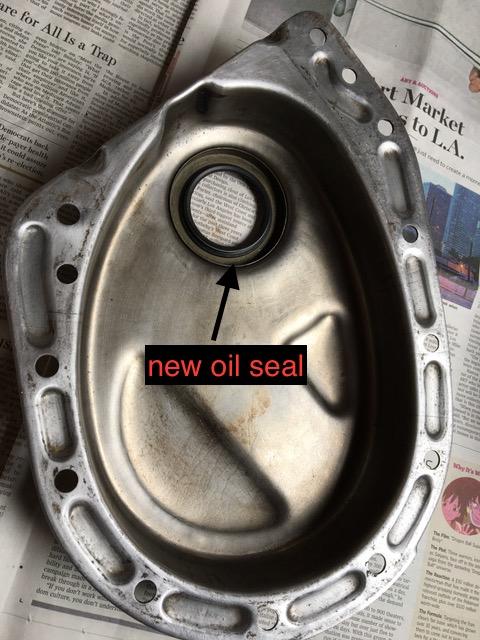
A leaking crankshaft oil seal in the the timing chain cover was fixed first. Generally not a difficult operation but all hoses and the radiator had to come off first. Complicating matters was the worn shaft on the harmonic balancer where the oil seal rides. Because of that, simply installing a new oil seal would have done little to cure the leak. Fortunately I found a NOS harmonic balancer on Ebay for $70. After a nice coat of paint, she found a warm home on the front of my engine.
A leaking crankshaft oil seal in the the timing chain cover was fixed first. Generally not a difficult operation but all hoses and the radiator had to come off first. Complicating matters was the worn shaft on the harmonic balancer where the oil seal rides. Because of that, simply installing a new oil seal would have done little to cure the leak. Fortunately I found a NOS harmonic balancer on Ebay for $70. After a nice coat of paint, she found a warm home on the front of my engine.

I also found a NOS timing chain for $39 however it proved to be slightly too long to be any improvement, so I reinstalled the serviceable original timing chain.
Next removed was the dirty, greasy 6v generator. It was fully disassembled, cleaned, the bearings packed, and the armature shined up with fine sandpaper. The brushes were good so it was put back together and painted gloss black.
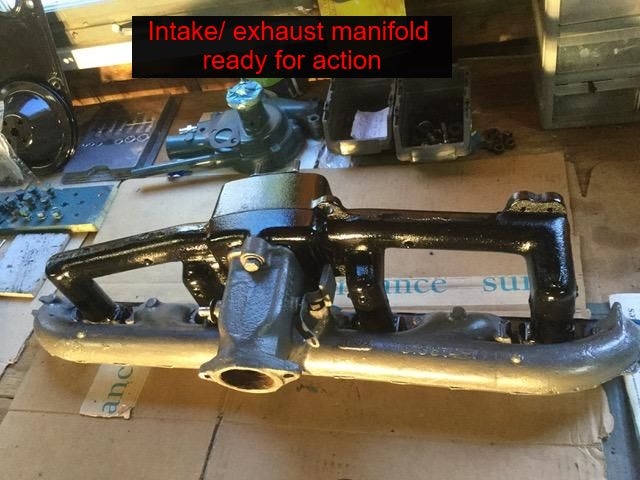
The exhaust/intake manifold was back from the machine shop after being resurfaced back to true. It was warped quite badly but there was enough material to make it better than factory specs. We left the assembly bolted together since it was risky to try to separate them just for a gasket that seemed okay anyway. Also, the shop welded a new plate into an area of the heat riser that blew out due to excessive heat from the stuck riser. This is all cast iron and not easy to weld but the shop’s welder was well qualified.
After a new bi-metal coil spring was installed, she was given a new paint job, regular enamel for the intake and high temp enamel for the exhaust side.
Next removed was the dirty, greasy 6v generator. It was fully disassembled, cleaned, the bearings packed, and the armature shined up with fine sandpaper. The brushes were good so it was put back together and painted gloss black.
The exhaust/intake manifold was back from the machine shop after being resurfaced back to true. It was warped quite badly but there was enough material to make it better than factory specs. We left the assembly bolted together since it was risky to try to separate them just for a gasket that seemed okay anyway. Also, the shop welded a new plate into an area of the heat riser that blew out due to excessive heat from the stuck riser. This is all cast iron and not easy to weld but the shop’s welder was well qualified.
After a new bi-metal coil spring was installed, she was given a new paint job, regular enamel for the intake and high temp enamel for the exhaust side.
I reinstalled the manifold using high tech flexible graphite exhaust gasket from a company called Remflex in Washington state. They withstand high temps and have 50% crush built in, won’t shrink or harden. We’ll see ! Originally these Buick straight 8s had no exhaust gaskets, just some graphite/kero concoction they slapped on at the factory.
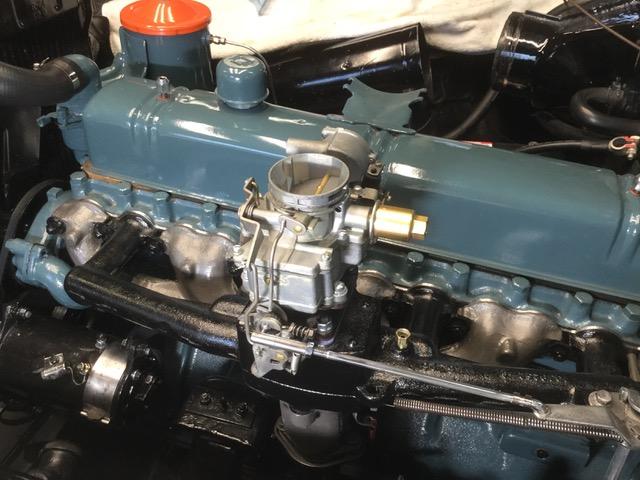
Seen above is the engine with the exhaust and intake manifolds installed along with the newly rebuilt generator (lower left).
Of course my engine temp gauge stopped working so I managed to find a temporary universal replacement from a local NAPA (Never Any Parts Available :-) store for $24.00. I couldn’t believe the sensor bulb and fitting fit perfectly into the original hole in the cylinder head. Someday I’ll send my original out to be restored.
Having had enough fun poking around inside the engine bay, I turned my attention to the braking system. Thinking I might as well have the car stop, not just go forward, I decided to undertake a full brake system rebuild.
Debating between a dual/power assist modern arrangement versus a stock original single master cylinder design, I decided on the latter. With minimal fabricating skills and my desire to stay original, I went with a simple replacement of original components. I installed a new reproduction master and wheel cylinders, all new steel brake lines pre-formed from factory patterns (In-Line Tube, Shelby Township, MI), new shoe linings and drums turned by Palmer Spring Co, Providence, RI.
Most importantly, I replaced ALL inner and outer axle bearing seals, and front wheel ease seals. Almost every one of these seals had varying degrees of failure, resulting in grease reaching the brake linings. It was not obvious at first but upon close examination, the grease had worked its way onto the lining surface.
This was a very dangerous condition that probably was very hard to detect by the previous owner as it occurred slowly over years of infrequent driving.
Seal replacement was not an easy job. The rear axles had to come out, which means removing internal parts of the rear differential and then grinding off the inner bearing races from the axle shaft in order to press on new races. Luckily, all the new oil / grease seals are fairly easy to find. Knowing which way the seals go in is very important as well.
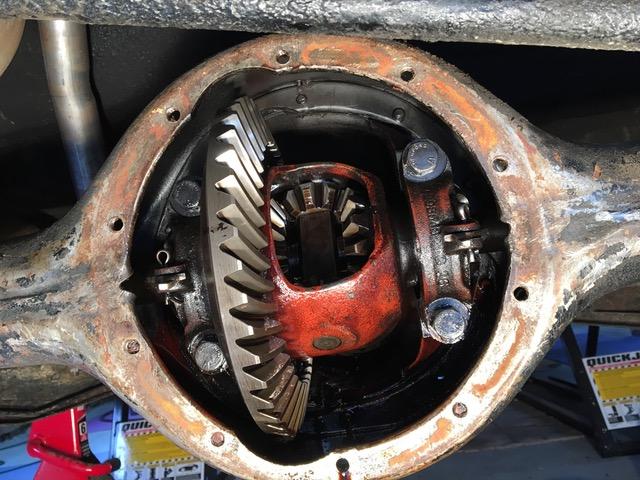
Above: Rear differential
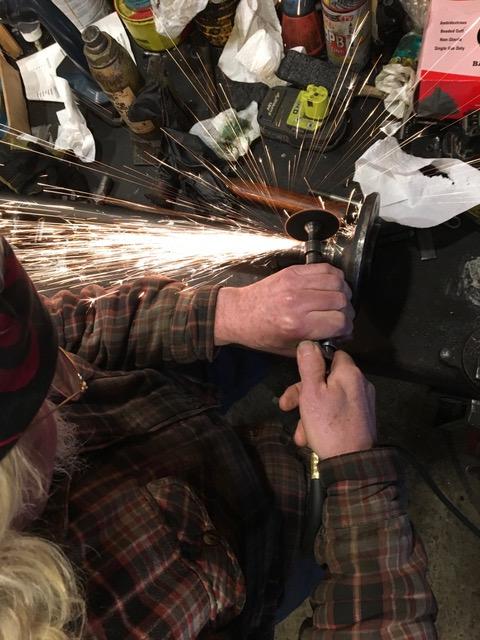
Above: Grinding of axel inner race
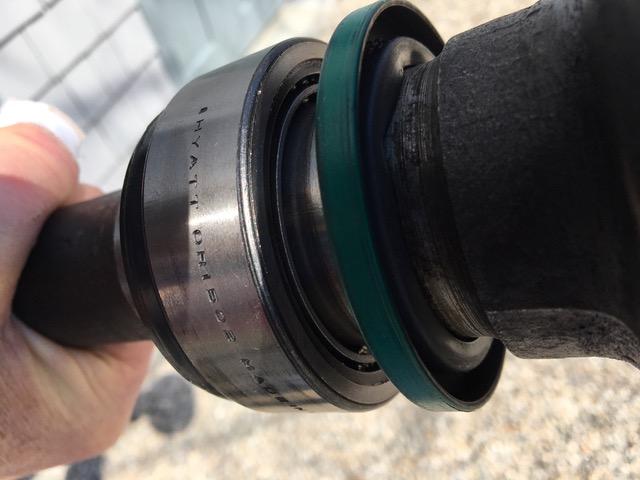
Above: Rear axel bearing and seals
Also obtained were 2 original radio static suppressors thanks to the generosity of one Bob Degoursey, our in-house oddball parts collector. These ingenious devices live inside the front wheel dust caps and help eliminate stray IR radio interference on the AM band. I’ve heard they also ward off evil spirits.
If anyone wants to learn more how these things work, reach out to member Ken Carr. He’ll set you straight.
If anyone wants to learn more how these things work, reach out to member Ken Carr. He’ll set you straight.
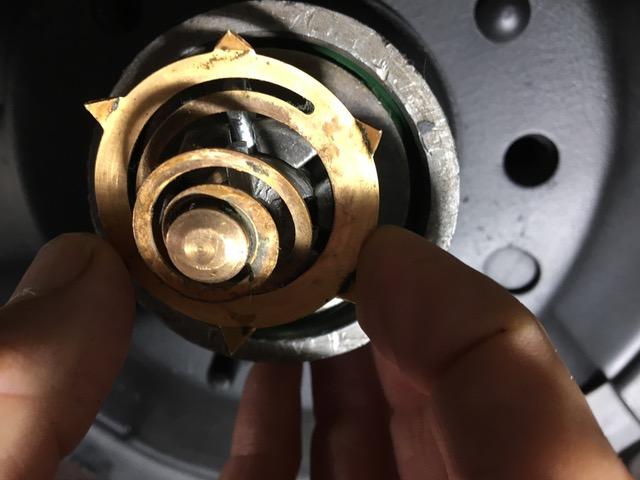
Above: Radio static suppressors
In conclusion, I believe I rebuilt the brake system correctly. I had no parts left over and was supervised and sometimes scolded by my mechanic neighbor for being too eager to paint and polish little things like shoe retainer springs.
I also removed, cleaned, drained, and refilled the rear knee action shocks. They were almost completely dry.
I also removed, cleaned, drained, and refilled the rear knee action shocks. They were almost completely dry.
Finally I bled the entire brake system of air, adjusted the shoes, and took her out for her first road test.
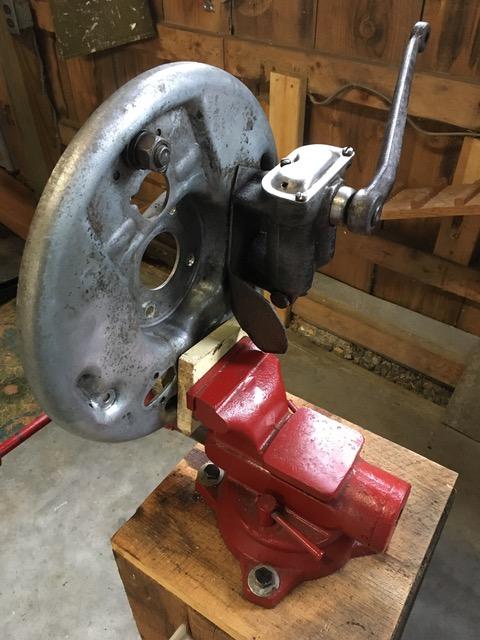
Above: Rear wheel backing plate and knee action shock that was refilled
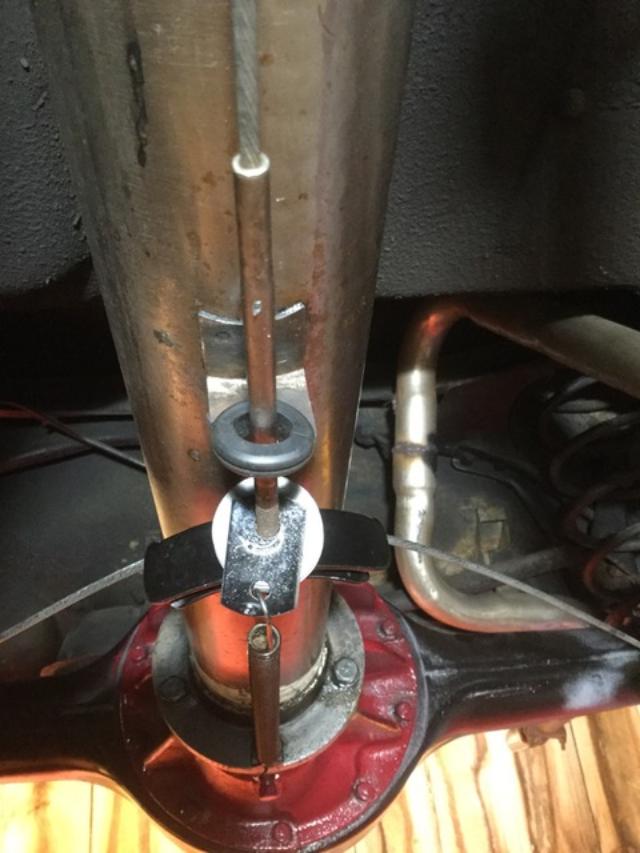
Above: Torque Tube with parking brake mechanism cleaned
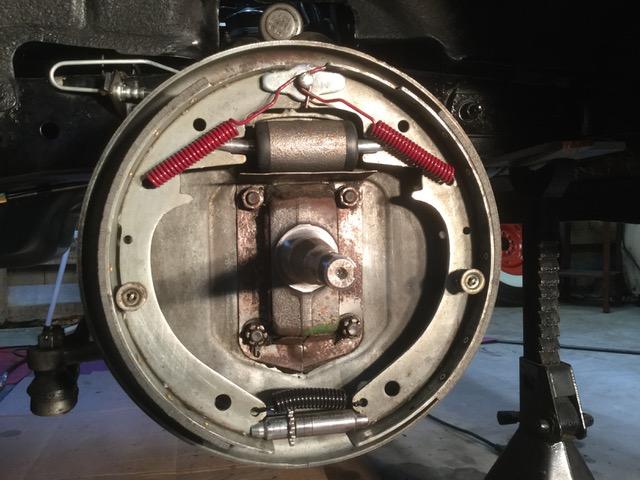
Above: Front brakes with new shoes, wheel cylinders, etc.
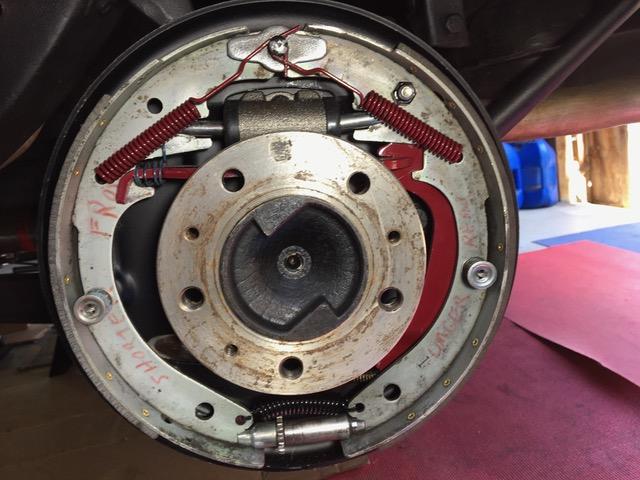
Above: Rear brake with new shoes, wheel cylinders, etc.
She stopped great but the engine died after about a mile. It turned out the carburetor had flooded. Managing to restart it, I limped home and later removed the carb. Again, after a quick disassembly, we noticed some whitish particles inside and blocking the float chamber valve.
Curiosity caused me to split open the new fuel filter I installed last winter. Sure enough, a piece of internal plastic had broken off and had come to rest clogging the float bowl. Beware of cheap foreign made fuel filters ! This week I bought and installed a traditional glass bowl type filter. She now runs fine and looks more like a 50s car to boot.
Curiosity caused me to split open the new fuel filter I installed last winter. Sure enough, a piece of internal plastic had broken off and had come to rest clogging the float bowl. Beware of cheap foreign made fuel filters ! This week I bought and installed a traditional glass bowl type filter. She now runs fine and looks more like a 50s car to boot.
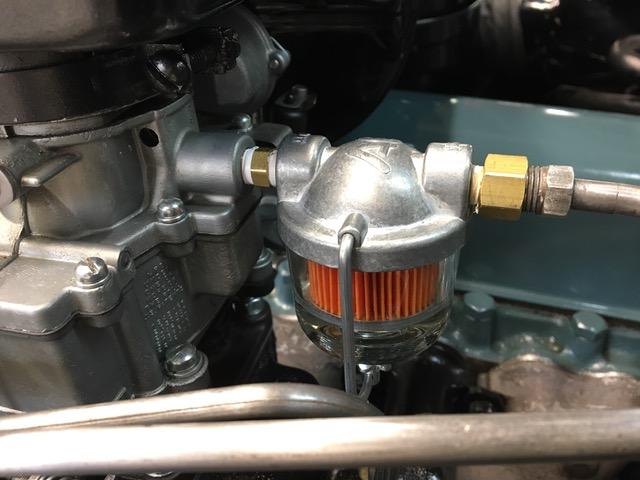
Above: Glass bowl fuel filter, newly installed
Another heart stopping moment on this ill fated road test was the clattering of the hydraulic lifters. Darn infernal modern things !
I didn’t panic and start tearing the engine apart but reached out to a few seasoned car club members. Their consensus was to add some Marvel Mystery Oil® down the push rods and a quart to the crankcase oil. After about 20 minutes of fast idling, she quieted right down. Perhaps the MMO broke up some dislodged crud and made the lifters happy once again. It made me happy anyway.
I celebrated by taking a swig of MMO for myself. That’s my story and I’m “sticking” to it !
By the way, she performed well on the 2nd road test, especially after I released the parking brake about a 1/4 mile into the drive (oops). Man, she took off like a F-14 Tomcat after that !
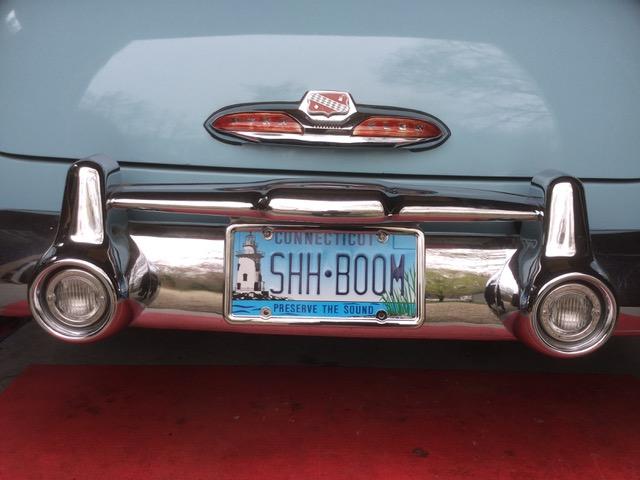
Afterburner backup lights??? What a great idea !
I didn’t panic and start tearing the engine apart but reached out to a few seasoned car club members. Their consensus was to add some Marvel Mystery Oil® down the push rods and a quart to the crankcase oil. After about 20 minutes of fast idling, she quieted right down. Perhaps the MMO broke up some dislodged crud and made the lifters happy once again. It made me happy anyway.
I celebrated by taking a swig of MMO for myself. That’s my story and I’m “sticking” to it !
By the way, she performed well on the 2nd road test, especially after I released the parking brake about a 1/4 mile into the drive (oops). Man, she took off like a F-14 Tomcat after that !
Afterburner backup lights??? What a great idea !
 RSS Feed